
Official Manufacturer Store and Learning Resource Site
About The
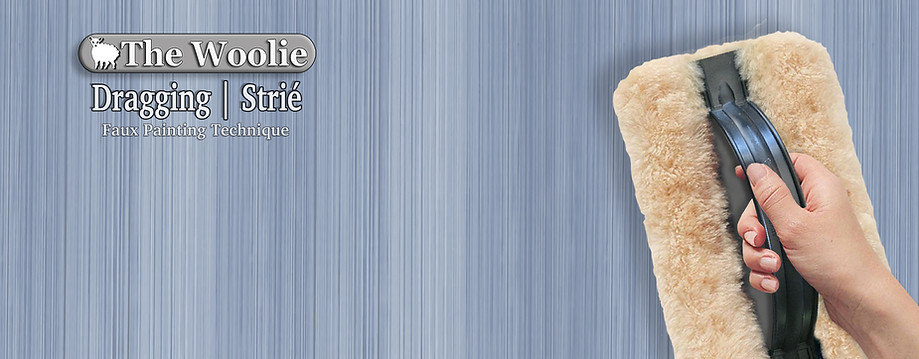
Strie | Dragging
Faux Paint Technique
How To Faux Paint 1-2-3 Steps

The Strié technique has been endeared for replicating the look of expensive textiles for centuries. This look is not trendy, instead it creates the look and feel of "stability and longevity" in home decor for walls.
The Woolie helps you keep a steady hand while making your passes on the wall. Unlike traditional brushes, The Woolie paint tool enhances your ability to keep steady while making your passes on a wall.

1-2-3-Faux!
Instruction Steps
Using The Woolie Original Faux Painting Pad
If you have never faux finished with The Woolie Faux Painting Tools and Techniques, view our detailed step-by-step instruction videos to ensure your delight and success.

Carefully review our
Preparation Instructions
before you begin. You will find them further down on this page.
If you have never faux finished with The Woolie Faux Painting Tools and Techniques, view our detailed step-by-step instruction videos to ensure your delight and success.
-
This Technique is easiest to do with two people.
-
Person #1 will apply the faux finish glaze using a roller and a brush near edges.
Helpful Tips
-
You must use 2 highly-contrasting wall paint colors.
-
These colors must be AT LEAST 4 shades apart.
-
Refer to our How to choose color combinations for this technique. This can be found further down on this page.
-
Person #2 will create the look by dragging through the faux glaze using The Woolie.
-
Person #1 will continue to apply the faux glaze color uniformly. This person should be aware of the pace of the other person who is blending the final look and adjust accordingly. Moving ahead too fast may cause the faux glaze to dry before it is blended.
-
Person #2 should always leave a small strip of wet unblended glaze between your area and the area where the glaze is being applied. This will avoid overlap lines between sections.
-
IMPORTANT NOTE: Do not reapply glaze once your blended area begins to dry. This will create an undesirable effect.


-
When you approach an edge, corner or ceiling line. (That has been protected by masking tape prior to painting)
-
Spread the glaze along the edges of the masking tape using a small paint brush to ensure consistent results.
-
If you reach an area that is too small for The Full-Size Woolie to fit, Use The Little Woolie to drag through the faux glaze.
Helpful Tips
-
It very important that you apply masking tape to protect your woodwork and ceiling lines BEFORE you begin painting.
-
Refer to the Room Preparation Instructions. This can be found further down on this page.
-
Always blend edges, corners and ceiling lines at the same time you are using the roller. Do NOT wait to do this until the end to blend these areas.
-
After each dragging pass, The Woolie will collect glaze from the surface.
-
Download excess glaze from The Woolie. This is done by dabbing with paper towels or lint-free rags.
-
If you feel that The Woolie is getting overly-saturated too frequently, this may indicate that too much glaze has been applied to the surface prior to dragging. Person #1 should adjust the application of glaze accordingly.

This Next Section Provides
Additional Resources and
Helpful Information
For This Faux Painting Technique
If you have never faux finished with The Woolie,
view our detailed step-by-step instruction videos to
ensure your delight and success.
This faux painting technique requires the use of faux finish glaze.

What is a faux finish glaze?
-
Glaze is simply a thin, translucent film of color that is applied over a base coat of a satin finish painted surface. Glaze creates a rich, dimension in many faux and decorative paint techniques.
What does faux finish glaze do?
-
Paint normally dries very quickly. Faux glaze slows down the drying time of paint which gives you more time to manipulate your color to create the look you want. It also makes paint colors translucent to enable you to create the look of depth and texture illusion.
What Kind of Glaze?
-
Water-based glazes and paints are the easiest to work with and to clean up.
-
You can buy glazes that are already tinted, or you can mix up your own custom glaze color.
How do I mix my own glaze?
Mix Faux Glaze (clear colorless) with your chosen paint color.
Combine clear (no color) faux glazing medium with your paint (either latex or acrylic). Generally the ratio is four parts glaze to one part paint, but you should follow the manufacturer's instructions.
Test your glaze mixture on a scrap board or poster board to make sure it's the right consistency and translucency.
Due to their nature, latex glazes can be customized to suit your needs.
The amount of glazing medium you add to the paint can affect the color of the glaze. When you're using lighter paint colors, a 4-to-1 mixture will not affect the value of the color.
But darker colors may be altered to a lighter color value when mixed with too much glaze. It's always best to experiment with the color on a piece of poster board.
The translucency of the glaze is determined by how much paint you add: more paint than glaze results in less translucency; less paint than glaze results in more translucency.
The more clear glaze that is added the longer that your glaze mixture will stay wet.
The more paint that is added the sooner that your glaze mixture will dry.

The Woolie Painting Techniques
Color Combination Samples
| Ideas | Examples | Inspiration |

The fact is that it's really very difficult to visualize paint color combinations. That's exactly why we offer many color and technique inspiration ideas and samples for your paint projects.
View our color samples to see what inspires you. This is a great first step! Next, play with the colors and blending to get your customized look.
All of our faux finish color combination samples are provided for the general purpose of visual inspiration. It's important for you to understand that each image will appear differently on every computer screen, and so will the suggested colors provided. The only way to determine actual colors is to visit your local paint store and select your preferred color swatches. We suggest that you experiment with sample colors that they offer prior to finalizing your color selections.
Create Your Own MINI-Sized Color Combination Samples!
-
Use inexpensive bottles of craft-sized paint and paint extender/glaze to create your custom color combination samples!
-
Use poster board from your local office supply store.
-
Use The Woolie (New) MINI-sized products to create your samples on poster board from your local office supply.
-
Your local Sherwin-Williams store will match your custom colors when you're ready to start your project.


Protect areas where you don't want paint
-
Apply high quality 2” beige masking tape to protect areas such as woodwork, ceiling and any other areas that need to be protected from paint.
-
We recommend using the FrogTape Brand in 2” inch width.
-
Do not use low-adhesion or blue masking tape for this.
-
Use a putty knife to seal the tape to the surface.
-
Plastic or heavy plastic-faced drop cloths should be used to cover and protect the flooring completely.

Surface Preparation
-
Prior to applying your base coat, make sure the area is clean of any contaminants such as grease, wax, dirt or any other material that would affect the adherence of paint to the surface.
-
If peeling paint, holes or cracks exist, they should be repaired with spackle, sanded and then touched up with primer.
-
If wall covering has been removed, make sure that any paste residue is cleaned from the surface. New drywall or plaster should be primed to seal the surface.
-
NOTE: If the paint is not adhering to the wall properly, (clumps up or cracks) it is likely because there is wallpaper paste, wallpaper removal solution or other residue on the wall. If this happens, we recommend to apply a coat of primer to the wall before painting.
-
If you have Eggshell, Satin, Semi-Gloss, Gloss or High Gloss Paint existing on walls, We recommend that you consult your local paint store professional as to the appropriate preparation necessary to paint on top of the existing surface sheen level.

Sheepskin Lint
-
WHY: The Woolie is made from natural sheepskin. When natural sheepskin is cut prior to the manufacturing of your tool, it WILL shed from the cutting process.
-
SOLUTION: It is necessary to remove any lint prior to use. You should remove any excess lint with the sticky side of masking tape.
-
If you remove the lint properly before the first use, you should not have to do this ever again.
How To Wash
The Woolie Tools
-
To clean, simply rinse in lukewarm water only.
-
Be sure to remove the paint from the sides.
-
Blot dry with a towel or paper towels, and fluff up.
-
If paint has dried on any of your paint tools, use a standard painter’s wire brush to GENTLY clean them.


